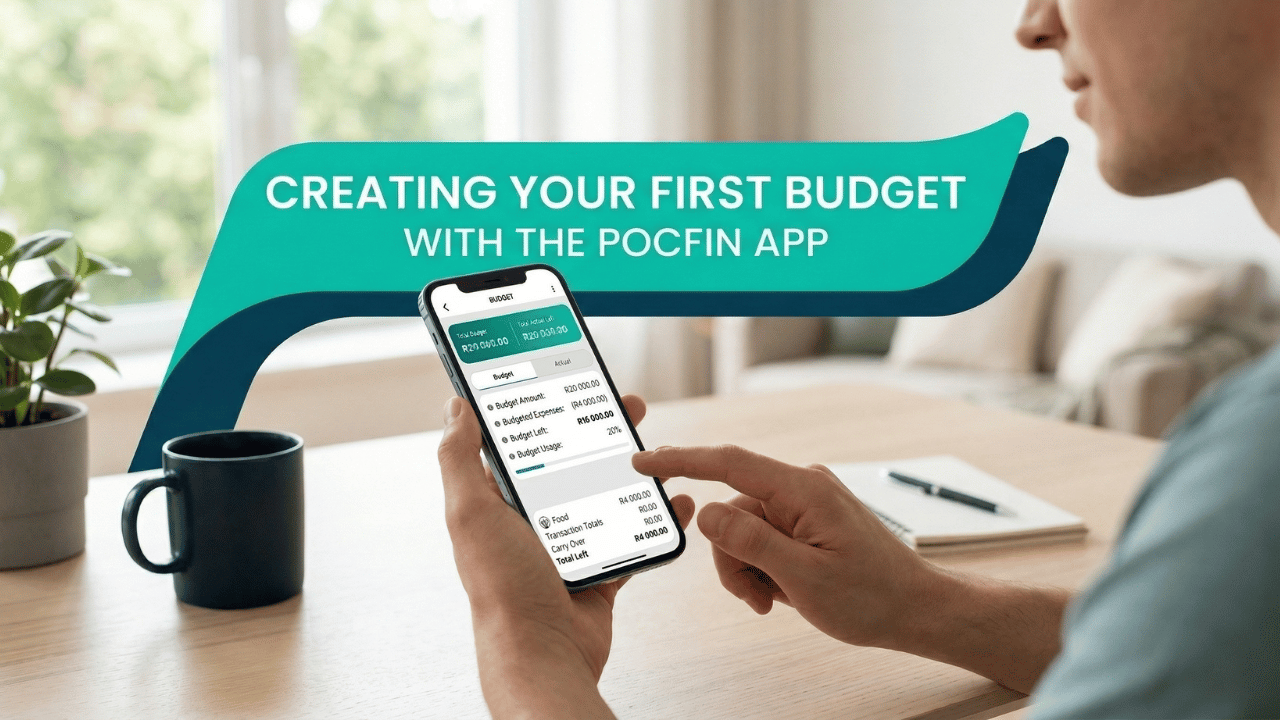
Step 1: Add A Budget Plan
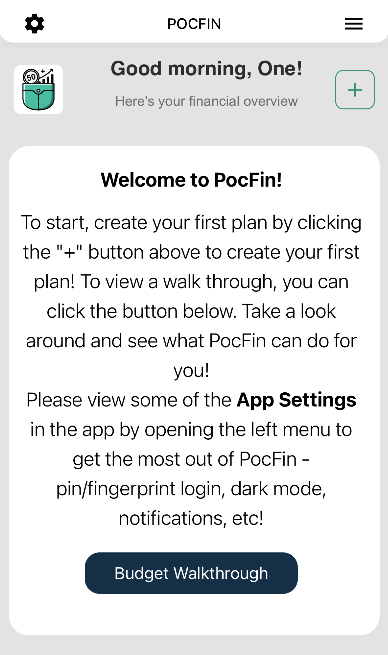
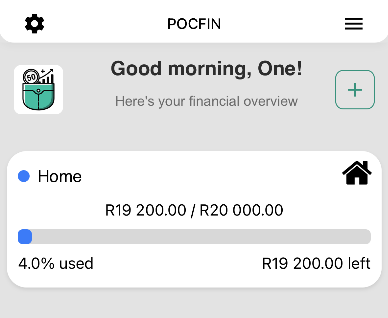
The first thing you’ll see is your home dashboard. Look for the "+" button in the top right corner - this is your starting point for everything new.
-
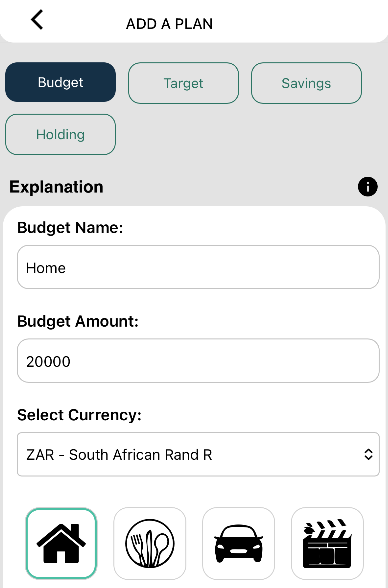
Select Your Plan: You’ll be taken to the "Add A Plan" page. Ensure "Budget" is selected.
-
Name It: Give your budget a name (e.g., "Home").
-
Set Your Amount: This is your total expected income for the month. If you have a joint income, add them both together.
Tip: If your income fluctuates, use a conservative monthly average. You can always change this throughout the months to give you more or less to play with.
-
Personalise: Choose your preferred currency and pick an icon that makes this budget easy to spot.
-
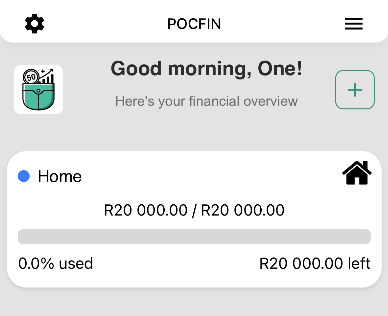
Submit: Hit save, and your primary budget container is ready!
Step 2: The Main Budget Page
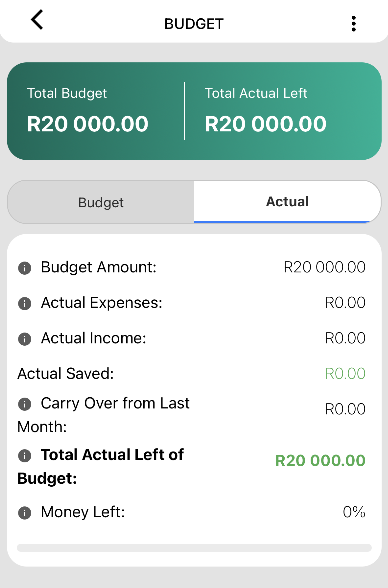
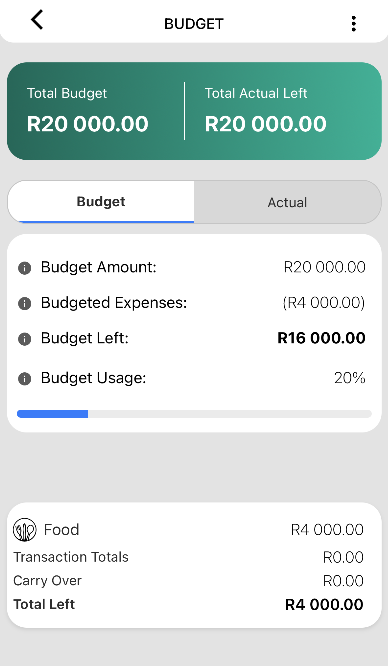
Once you click into your new budget, you’ll see two main "toggles" or pills near the top, labelled Budget and Actual. These give you a bird's-eye view of your money:
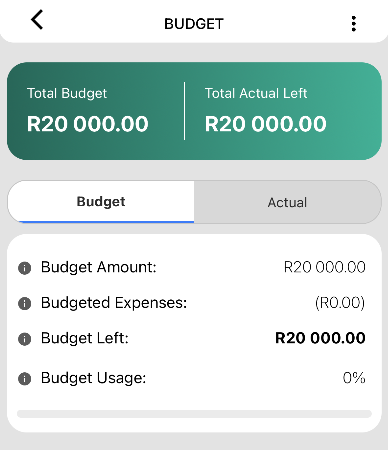
- The Budget Pill: This shows your plan. You’ll see your Budget Amount (what you set when creating this budget), your Budgeted Expenses (the sum of all categories you're about to create), and your Budget Left (How much left to allocate to categories). This pill has nothing to do with spending or saving (transactions) but about the budget itself.
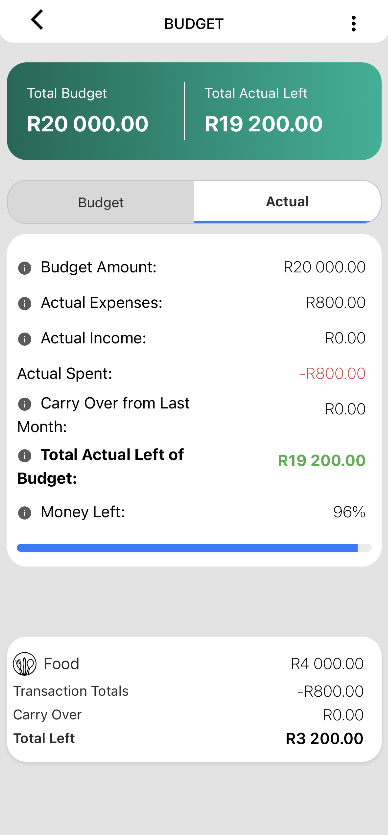
- The Actual Pill: This is your reality check. It tracks Actual Expenses (what you’ve actually spent), Actual Income (any extra money like tax rebates or refunds you record), and your Carry Over from previous months. This section tells you exactly how much physical cash is left to spend right now within the budget - it is the summary of your transactions against the budget.
Step 3: Create Your Categories
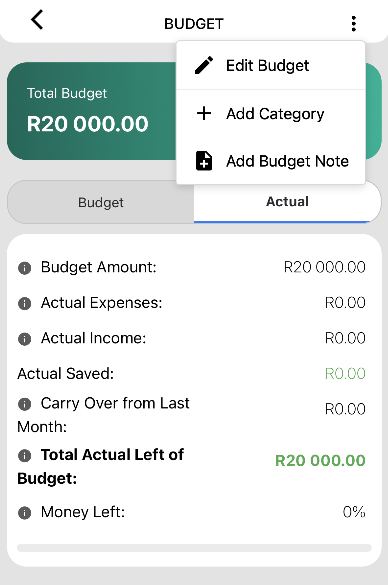
Now, we break that big budget down into "envelopes." Click the three dots in the top right and select "+ Add Category."
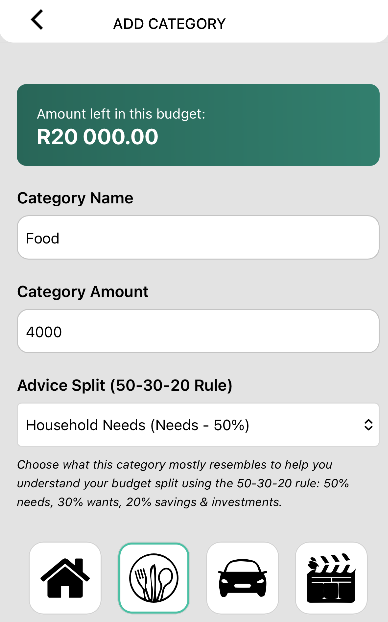
- Amount Left in this budget: You’ll see how much "unallocated" money is left in your budget.
- Name and Amount: Enter a name and an amount for this specific category (e.g., "Food", 4,000). You are now setting an amount of money you are happy to spend in this category. If you do not know an amount, a good exercise is to go to your bank statement and look through the past month of expenses - add up what you believe will go into this category and set that amount.
- Examples: Common categories include Rent/Bond, Insurance, Petrol, Medical Aid, Cellphone, Entertainment, Home Maintenance, Health, Cleaning, Personal Fund, and - most importantly - your Emergency Fund or Investments.
- Advice Split: You can set this to show, if you are a pro PocFin user, the advice split of what a common rule of the 50-30-20 rule is in another page which shows the split of all your categories between needs (50%), wants (30%), and savings and investments (20%).
- Submit: Once you pick an icon and save, you’ll notice your "Budget Left" figure on the main budget page when you click on the budget pill automatically decreases.
What each category card numbers mean (from the top number):
- Category Amount - how much you set per month to this category that can be spent.
- Transaction Totals - all transactions added up
- Carry Over - any money left from previous months brought forward
- Total Left - how much is left in this category (Category Amount - Transaction Totals - Carry over)
Step 4: Adding Your First Transaction
Categories are just empty envelopes until you fill them with transactions. Click on a category (like "Food") to enter the category page. You’ll see in the top card your:
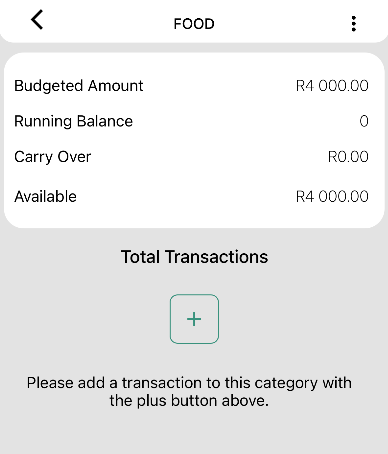
- Budgeted Amount - the amount you set for this particular category to spend on each month
- Running Balance - your transaction totals within this category
- Carry Over - any amount carried over from previous months (can be negative or positive)
- Available - what’s available from Budgeted Amount - Running Balance - Carry over. What is your amount left to spend within this category.
To add a purchase:
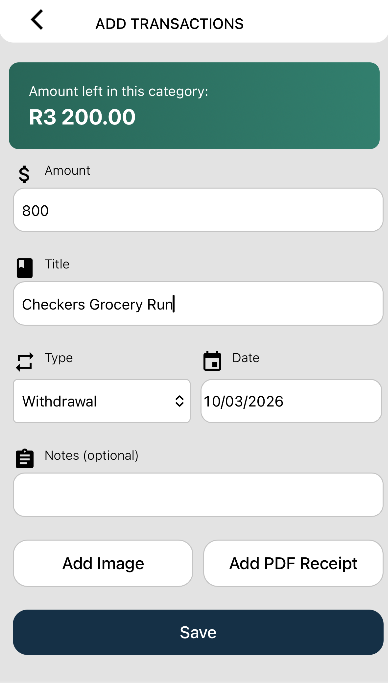
- The Big Plus: Click the large "+" button to open the add transaction page.
- The Details: Enter the amount and a title (e.g., "800, Checkers Grocery Run").
- Type: Select "Withdrawal" if you spent money, or "Deposit" if you’re adding money back into that category.
- Date & Notes: The date defaults to today. We recommend not logging items more than a month old to keep your current data accurate.
- Go Pro with Receipts: Pro users can upload an image or PDF of the receipt here - perfect for tax season or tracking warranties later. You can share and download these at a later stage.
Step 5: Watch the Magic Happen
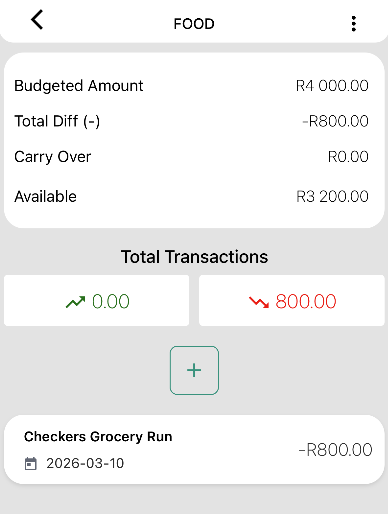
After clicking Save, you’ll be zipped back to the category page. You’ll see your transaction listed and your "Available" balance updated instantly.
When you head back to the main budget dashboard, your Total Actual Left will have updated to reflect that spend.
That’s it! You’ve officially started your journey toward financial clarity. Keep adding categories until every “dollar” has a job. Stay tuned for our next post, where we’ll dive deep into "Carry Over" and how it helps you manage overspending (or big savings) from month to month.
Cheers,
The PocFin Team
Sign in to join the conversation.